2nd and 3rd graders returned this week for another 2 week rotation!
2nd graders started
on a lesson inspired by Filipino artist Pacita Abad. We first
worked on a quick write while looking at one of her works and it made
me so joyful to see students use the words that we use regularly in
class! Literacy in art is important!
As I introduced the artist and talked about her many works, there were several students that shared "I'm Filipino too"! It is so important for students to see themselves in the art and artists we work on - representation matters.
Students also created 15 patterns incorporating lines and shapes that they would use in their final work. I had 11" X 14" canvases for each student to use. Each student used pencil to divide the space up into sections using vertical and horizontal lines and started coloring each section with paint sticks to continue works next class.
3rd graders looked at the works of artist Halima Cassell, a UK based artist who creates large clay sculptures. We looked at how her works have symmetrical and asymmetrical balance and had a class discussion. Each student folded paper in several ways and arranged them on a 12" black card stock to create a work incorporating symmetry. They also used metallic markers to add lines and shapes to maintain the symmetry.
UTK students returned to complete gluing paper on their works to complete their mosaic heart. I punched holes along the edge and taped a long piece of ribbon to each work. On the other end, I used tape around the edge to create a needle that students could use to lace the holes to complete their work!
Kinders and 1st graders looked at a variety of still life works by different artists and we discussed what makes a still life? We compared and contrasted the works of Nicole Dye, Paul Cezanne and Pablo Picasso.
Kinders created a table line on their paper and created line patterns on a rectangle. They folded the sides, added glue and curved it to add to their paper. They also used paper strips as handles to create a still life of a coffee mug. We added polyfill for steam to complete works!
I differentiated the above lesson for 1st graders by having them create patterns in the background and also creating a fruit next to their mug using an oil pastel!
UTK and kinders looked at the heart artworks of artists of Jim Dine, James Goldcrown, Romero Britto and Chris Uphues and we had a class discussion about what was same and different. It is always interesting to hear what every class has to say and at this point in the school year even those students that have been quiet start speaking up to share their observations which is just precious!!
UTK students traced a giant heart on to a piece of white poster board with pencil, outlined it with a black Sharpie and cut construction/ paper into small pieces to glue them inside the heart to create a mosaic effect. Most students filled half their heart with paper pieces and I saved their works to continue next class.
For kindergarten, I traced lines using pencil on a 12"x12" black card stock so it was divided into 4 boxes. I gave each student a small heart template that they used to create a heart inside each of the 4 boxes using a pencil. We used a different media inside each of the 4 hearts - first with oil pastels to create a face, 2nd with paper pieces to create a mosaic, 3rd with yarn and 4th with paint + cotton swabs outside the 4th heart!
1st graders created clay monsters - each student first created a pinch pot by making a sphere out of the clay I gave them. We used the heel of our palm to make the pointy parts of the clay smooth and then rolled it on the moist canvas to create a rounded surface. We then made a hole by pushing our thumb in and pinching and turning and repeating this until it became uniform. We then turned the pinch pot sideways which would be the opening of mouth. Students then added details like teeth, eyes, eyebrows, nose and horns using the slip and score technique and added textures to complete their works.
I can't wait to fire these and have students paint!
How is it 2024 already?!! We started school in the New Year on Wednesday, 1/3/24 and I rearranged our 4th and 5th grade schedules a bit differently to accommodate all classes equitably!
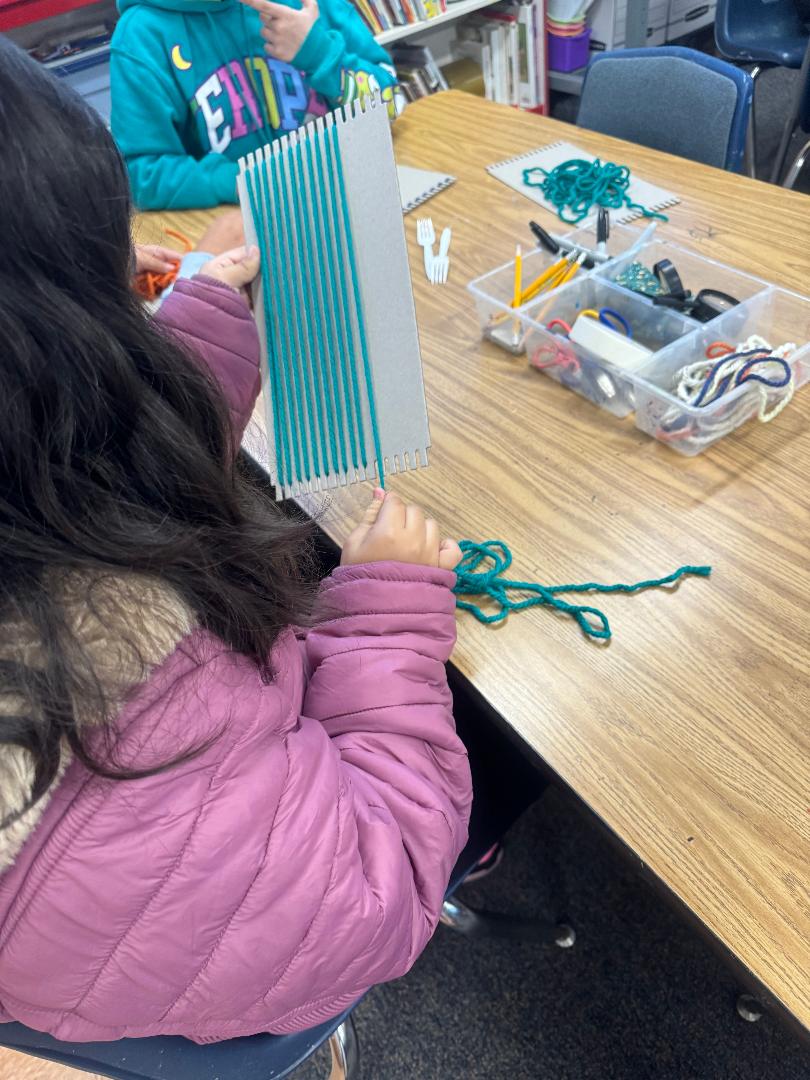
4th and 5th graders started on their cardboard loom lesson - this is one of my favorite lessons because I get to talk about textiles!!
I start the class by having students look at pieces of fabric, their jackets, pants and shoe laces through a magnifying glass. We talk about the yarn they notice and how they appear criss-cross on certain fabrics and diagonal on other fabrics. I introduce the words, loom, warp, weft, yarn and textiles/ cloth/fabric. I share my Saree from India and discuss how this is handwoven while most fabric these days including the clothes they are wearing is woven using machines.
We then look at weaving videos from different parts of the world - Ghana, India and Mexico and it's always nice to see students share how they have seen textiles like the ones shown or have seen them elsewhere.
I give each student a cardboard loom with a long piece of pre-measured yarn. I show them how to tape one end of the yarn to the back and use this as the warp by going through the notches. Once done they tape the other end so their loom is ready. I have shorter pieces of yarn available at each table and we first practice how to tie knots as this is integral to the weaving process. I show students how to add the weft by going over and under from one side to the other, make a U turn and repeat until they have a small piece left that they can tie to a new piece of weft and continue the process. I remind them also to use forks or their fingers to pack the yarn close together without too many gaps between the warp strings.
Most students were able to add 4-5 pieces of weft to their work.
5th returned to start work on our 3D printing design for their 45 minutes class. This year they will be creating name key chains. I set up classes on the Tinkercad website and tested out a few samples during the holidays so I could have an idea as to what problems students could potentially run into while designing theirs. Each class came in with their Chromebooks and I provided them with mouses to make it easier for them. We practiced first logging into their Tinkercad classroom, learning the various terms such as practicing the different tools such as work plane, undo, redo buttons, looking for basic shapes, rotation button among many others. Students dragged the letters of their name onto the work plane such that each letter was 5mm tall. I also gave them the website name, user ID and nickname on a piece of paper they could tape to their Chromebook so they will be able to practice at home. We will continue this next class.
Zamorano received a generous grant from the New Children's Museum to have a circular loom for our school and have artist Michelle Montjoy work with all 5th grade students on a looping project. We also had teaching artists from NCM come to assist Michelle. We had a fantastic day with students working on the looms and creating looping using t-shirt yarn. We will continue this work during our rotations with 5th graders over the new few weeks.
3rd graders returned to complete their fish this week! Students colored in their fish, took a photo with their Chromebooks. They used the website remove.bg to upload the photo, remove their background (the paper) and superimpose the habitat they picked from their planning sheet the previous week. I also taught them how to download their final work and upload it to the art Google Classroom.
2nd graders returned to add a warm color to their background and also create tints to fill in the shapes to complete their work. I read the story "Monochromatic Dan" by Allison Gharst - it is a fantastic story about Dan who like tints and shades of brown and his perspective on colors changes when he meets luminous Lil!
Birch aquarium came to our school the week before Thanksgiving for a "Fish Diversity" outreach program with all 3rd grade classes. The instructor introduced students to the different habitats in the ocean, fish body shapes, teeth types and coloration. Students also had the opportunity to observe 2 dead fish for the above characteristics.
This week I gave students a planning sheet to plan what their "fantasy fish" would look like! They chose a habitat, teeth type, body shape and coloration. They combined these elements to draw their fish and traced their fish using a black Sharpie to continue work next class.
2nd grade students looked at the below artwork and we had a class discussion about what we saw!
Students noticed the below :-
1. There are only 2 people.
2. There are lights because it is night time.
3. It looks like Fall on the left because of the yellow, orange and red and winter on the right because of the blue, green and purple on the right.
We discussed what warm and cool colors are.
Students first created any shape they wished to on a 9"x12" poster board. They then created lines using a ruler and traced it using a black Sharpie marker. They noticed how their paper was divided into a number of different shapes. I gave each student a different cool color tempera paint to paint inside their shape. I gave them white paint to create tints that they also used inside their shapes. I let them know they would be a using warm color around their shape next week.
Students this week worked on creating the element of art Value in their artwork. We looked at the below example and had a class discussion about what we saw.
Students noticed that
1. Each heart had just one color and that it was light in a few places and dark in others places. 2. They noticed that it looked like it was shining and the colors resembled those in a rainbow. 3. The black heart was camouflaged with the background and wad wad hard to notice!
After this discussion, I introduced students to the words tint and shade and explained how artists sometimes just use one color in their art but make new colors by mixing it with white to create tint and black to create shade. This is called "Value".
UTK and kinder students created ice cream cones on black card stock. They used metallic markers to add details. I gave each student a different color tempera paint that they painted the first scoop with and gave them white paint to mix to create 3 tints to add to the different scoops.
1st grade students created lines using rulers and then added circles to create shapes on their paper. They used a white paint stick to trace over the pencil lines. I gave each student a different color
tempera paint that they painted their shapes with and gave them white
paint to mix to create 3 tints to add to the more shapes.
%20%E2%80%A2%20Instagram%20photos%20and%20videos.png)
%20%E2%80%A2%20Instagram%20photos%20and%20videos.png)
%20%E2%80%A2%20Instagram%20photos%20and%20videos.png)
%20%E2%80%A2%20Instagram%20photos%20and%20videos.png)




%20%E2%80%A2%20Instagram%20photos%20and%20videos.png)
%20%E2%80%A2%20Instagram%20photos%20and%20videos.png)
%20%E2%80%A2%20Instagram%20photos%20and%20videos.png)
.jpg)


%20%E2%80%A2%20Instagram%20photos%20and%20videos.png)
%20%E2%80%A2%20Instagram%20photos%20and%20videos.png)
%20%E2%80%A2%20Instagram%20photos%20and%20videos.png)


.jpg)


